
How Temperature Affects Oven Cleaning Efficiency

Temperature plays a crucial role in how effectively an oven can be cleaned. Whether using commercial cleaning products, natural solutions, or a self-cleaning function, the level of heat inside the oven impacts how quickly and efficiently grease, grime, and burnt food residues break down. Understanding how heat interacts with different cleaning methods can help ensure a thorough cleaning while protecting the appliance from damage.
The Role of Heat in Residue Breakdown
Grease and food particles harden when exposed to repeated high temperatures, forming stubborn layers that become difficult to remove. However, heat can also be an advantage when cleaning an oven, as it softens residues, making them easier to wipe away.
Warm surfaces allow cleaning agents to penetrate grease more effectively, lowering the need for excessive scrubbing. When an oven is too cold, cleaning products may struggle to break down tough grime, requiring multiple applications and more effort. For this reason, many cleaning methods recommend warming the oven slightly before applying a degreaser or homemade solution.
The Effectiveness of Heat in Different Cleaning Methods
Cleaning efficiency varies depending on the method used and the temperature involved. Some approaches rely on extreme heat to burn off debris, while others work best at moderate temperatures that loosen grime without damaging oven components.
Warm Oven Cleaning
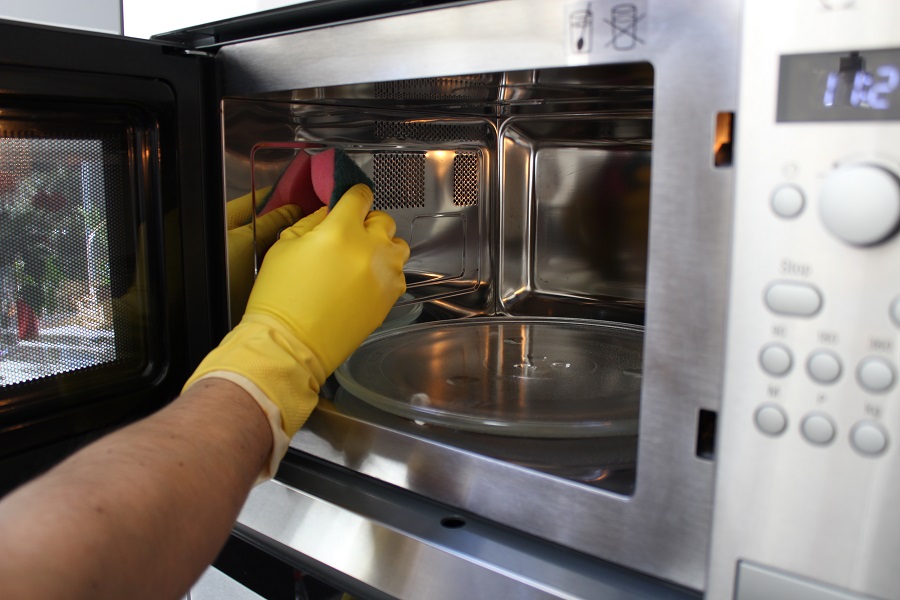
Many household cleaning solutions, including baking soda and vinegar, work best when applied to a warm oven. Heating the oven to around 50°C before turning it off and applying the cleaning solution helps grease soften, allowing natural cleaners to break down residue more effectively. This method is ideal for those who prefer non-toxic cleaning options and want to avoid the fumes associated with strong chemical cleaners.
High-Temperature Self-Cleaning Cycles
Modern ovens often feature a self-cleaning mode, which operates at extreme temperatures of up to 500°C. This process, known as pyrolytic cleaning, burns grease and food residues into ash, which can then be wiped away easily once the oven cools down. While effective, the intense heat puts strain on the oven’s internal components and can create smoke or strong odours if excessive grease is present. Using this function occasionally rather than as a primary cleaning method helps maintain the appliance without causing unnecessary wear.
Steam Cleaning at Moderate Temperatures
Some ovens include a steam cleaning feature, which uses lower temperatures, typically around 200°C, to generate moisture and loosen grime. Placing a bowl of water inside the oven and heating it to this temperature creates steam that softens grease, making it easier to remove with a cloth. This method is gentler than pyrolytic cleaning and does not produce strong odours or high heat stress on oven components.
Best Temperature Conditions for Optimal Cleaning
Choosing the right temperature for cleaning depends on the level of grime and the method being used. For general maintenance, slightly warming the oven before applying a cleaner enhances effectiveness without requiring high heat. For deeper cleans, steam-based methods provide a balance between efficiency and appliance safety.
It is important to avoid applying cold water or cleaning products to a hot oven, as sudden temperature changes may damage the oven’s surfaces, including cracking the glass door or warping metal racks. Allowing the oven to cool slightly before wiping it down prevents thermal shock while still benefiting from heat’s residue-softening effects.
Maintaining a Clean Oven with Temperature Control
Using temperature strategically not only helps during the cleaning process but also prevents excessive build-up in the first place. Cooking at unnecessarily high temperatures can cause more splattering and grease accumulation, while regularly wiping down a slightly warm oven after use prevents grime from hardening. Placing oven-safe liners on racks can catch spills, reducing the residue that needs to be cleaned later.
Understanding how temperature affects cleaning efficiency allows for a more effective approach to oven maintenance. Whether using gentle heat to loosen grime or relying on high-temperature cleaning cycles, choosing the right method based on the oven’s condition ensures better results with less effort.
FAQs
Is it safe to use oven cleaners on a warm oven?
Yes, but only if the oven is slightly warm and not hot. Many cleaning solutions work best on a warm surface, but applying products to a hot oven can cause fumes and rapid evaporation, reducing effectiveness.
Does high-temperature cleaning damage ovens over time?
Frequent use of self-cleaning cycles at very high temperatures can put a strain on internal components, such as heating elements and door seals. Using this function occasionally and opting for gentler cleaning methods in between helps preserve the appliance’s longevity.
Can I steam clean my oven without a built-in steam function?
Yes, placing a heatproof dish filled with water inside a preheated oven at around 200°C for 20–30 minutes creates steam that loosens grease and softens residue, making it easier to wipe away.
Using the right temperature during oven cleaning makes the process more efficient and less time-consuming. Whether through moderate heat to loosen grime or controlled steam cleaning, temperature management plays a key role in keeping the oven in top condition.

Get Your Oven Door Glass Sparkling Clean: A Complete Guide

Have you ever been excited to check on your baking masterpiece, only to be met with a foggy oven door that obscures your view? We've all been there! But fear not because we're here to help you achieve crystal-clear oven door glass without the hassle.
We'll walk you through the entire process, from gathering your supplies to maintaining a sparkling oven door for the long haul. Say goodbye to cloudy views and hello to a brighter, cleaner kitchen!
The Importance of Clear Oven Door Glass
Let's talk about why clean oven door glass matters. Not only does it enhance the aesthetics of your kitchen, but it also plays a crucial role in maintaining a safe and enjoyable cooking environment.
Dirty oven door glass can make it difficult to monitor your food while it's cooking and may even impact the taste and quality of your dishes. Keeping your oven door glass clean also helps prevent grease build-up and potential safety hazards.
Essential Supplies for Cleaning
Before you start, ensure you have everything you need for the job. You'll want to gather basic household items like dish soap, baking soda, vinegar, and a microfibre cloth or sponge.
If you prefer, you can also invest in specialised oven cleaning products for added convenience. Having the right supplies on hand will make cleaning much smoother and more effective.
Preparing Your Oven for Cleaning
Safety first! Before you clean your oven door glass, take a few moments to ensure that your oven is turned off and completely cooled down. This will help prevent accidents or injuries during the cleaning process. It's also a good idea to remove any oven racks or accessories to give yourself better access to the glass.
Step-by-Step Cleaning Guide
Now, let's get down to business! Start by mixing up a cleaning solution using your chosen ingredients – a simple mixture of dish soap and water or a more specialised oven cleaner.
Apply the solution to the oven door glass and let it sit for a few minutes to loosen any stubborn grime. Then, use a microfibre cloth or sponge to gently scrub away the dirt and grease, working in circular motions for best results. Rinse the glass thoroughly with water and dry it with a clean cloth to reveal a sparkling finish.
Tackling Stubborn Stains and Build-up
If you encounter any tough stains or build-up on your oven door glass, don't panic! You can try plenty of tricks to break down the grime and restore your glass to its former glory.
For example, you can create a paste using baking soda and water and apply it to the stained areas, letting it sit for a while before scrubbing it away. Alternatively, a vinegar solution can dissolve stubborn grease and residue. Just be sure to test any new cleaning methods in a small, inconspicuous area first to avoid damaging the glass.
Maintaining Clean Oven Door Glass
Congratulations—your oven door glass is now sparkling clean! But how do you keep it that way? The key is to incorporate regular maintenance into your cleaning routine. Make it a habit to wipe down your oven door glass with a damp cloth after each use to prevent grease and grime from building up. Additionally, consider scheduling a deep clean once a month to keep it looking its best.
And there you have it—a complete guide to achieving spotless oven door glass! With the tips and techniques outlined in this article, you'll enjoy crystal-clear views of your culinary creations without any hassle. So go ahead, confidently tackle that oven door glass, and revel in the beauty of a sparkling-clean kitchen. Happy cleaning!
FAQ Section:
Can I use abrasive cleaners like steel wool to clean my oven door glass?
It's best to avoid abrasive cleaners or tools like steel wool, as they can scratch and damage the glass. Stick to gentle cleaning methods using non-abrasive materials to protect the integrity of your oven door glass.
Is using lemon juice or vinegar to clean oven door glass safe?
While lemon juice or vinegar can be effective natural cleaners, they are acidic and may potentially damage the seal on some oven door glass. It's safest to dilute these solutions and perform a spot test before using them on the entire surface of your oven door glass.
How often should I clean my oven door glass?
The frequency of cleaning your oven door glass depends on how often you use your oven and how quickly it accumulates grime. As a general rule of thumb, aim to clean the glass at least once a month to maintain optimal clarity and hygiene. Adjust the frequency based on your cooking habits and the condition of your oven door glass.
© Fast Oven Cleaning

Cleaning Oven Racks: Techniques for a Gleaming Finish

Introduction
Oven racks are crucial in our kitchen appliances, ensuring our meals are perfectly cooked. Over time, however, they can accumulate grime, grease, and baked-on food residues, making them appear unsightly and potentially affecting the flavour of your dishes. But fear not! In this guide, we will explore practical techniques for cleaning oven racks and restoring them to a gleaming finish without the need for harsh chemicals or excessive elbow grease.
Why Clean Your Oven Racks?
Before delving into the cleaning methods, it's essential to understand why cleaning your oven racks is essential. Here are some compelling reasons:
1. Improved Cooking Efficiency
Clean oven racks allow for better air circulation within your oven, ensuring that your food cooks evenly. This results in more consistent cooking and reduces the risk of overcooking or burning your dishes.
2. Hygiene and Food Safety
Dirty oven racks can harbour harmful bacteria and food particles, posing a potential health risk. Regular cleaning helps maintain a hygienic cooking environment and prevents cross-contamination.
3. Prolonged Appliance Lifespan
A well-maintained oven, including clean racks, will likely have a longer lifespan. Neglecting cleaning can lead to the buildup of residue that may damage the oven's heating elements or affect its performance.
Now that we understand the importance of keeping our oven racks clean let's explore some effective cleaning techniques.
Technique 1: Soaking in Warm, Soapy Water
This straightforward method involves soaking your oven racks in warm, soapy water to loosen stubborn grease and grime.
Steps:
1. Remove the Oven Racks:
Start by removing the oven racks from your oven. Make sure they are cool to the touch before handling them.
2. Fill a Bathtub or Large Container:
Find a suitable container, such as a bathtub or a large plastic bin, and fill it with warm water. Add a generous amount of dish soap to create a soapy solution.
3. Submerge the Racks:
Place the oven racks in the container, fully submerging them in the soapy water.
4. Let Them Soak:
Allow the racks to soak for several hours or overnight. This soaking period will help soften and loosen the baked-on grime.
5. Scrub and Rinse:
After soaking, use a non-abrasive scrubbing pad or an old toothbrush to scrub away the loosened dirt and grease gently. Rinse the racks thoroughly with clean water.
6. Dry and Reinstall:
Once clean, dry the racks with a towel and reinstall them in your oven.
This soaking method is gentle yet highly effective in removing stubborn stains and residues from oven racks. It's also a chemical-free approach, making it safe for your health and the environment.
Technique 2: Baking Soda and Vinegar Magic
Baking soda and vinegar, often kitchen powerhouses, can work wonders when cleaning oven racks.
Steps:
1. Remove the Oven Racks:
As before, start by removing the oven racks from your oven.
2. Create a Baking Soda Paste:
Mix a sufficient amount of baking soda with water in a bowl to create a thick paste. The paste should be spreadable but not too runny.
3. Apply the Paste:
Using a sponge or a brush, apply the baking soda paste to the oven racks, ensuring you cover all stained areas thoroughly. Pay extra attention to heavily soiled spots.
4. Let It Sit:
Let the paste made of baking soda stay on the racks for at least half an hour. This gives it time to break down the grease and grime.
5. Scrub and Rinse:
Using a scrubbing pad or a brush, gently scrub the racks to remove the loosened dirt. You can add more baking soda to stubborn areas if needed. Once cleaned, rinse the racks thoroughly.
6. Vinegar Rinse:
To enhance the cleaning power and remove any remaining residue, fill a spray bottle with white vinegar and lightly mist the racks. The vinegar will react with the baking soda, creating a foaming action. Let it sit for a few minutes, then rinse the racks with water.
7. Dry and Reinstall:
After a final rinse, dry the racks completely with a towel and reinstall them in your oven.
Combining baking soda and vinegar provides a practical, eco-friendly solution for cleaning oven racks. It's especially useful for tackling tough, baked-on stains.
Technique 3: Dishwasher Magic
If you have a dishwasher with ample space, you can use it to clean your oven racks efficiently.
Steps:
1. Check Dishwasher Size:
Before attempting this method, ensure that your oven racks fit comfortably in your dishwasher without bending or warping.
2. Remove Loose Debris:
Scrape any loose debris or food particles from the oven racks using a plastic scraper or a brush.
3. Place in Dishwasher:
Lay the oven racks flat on the bottom rack of your dishwasher, taking care not to overcrowd them. If you have a top rack with adjustable height, you can use it as well.
4. Add Dishwasher Detergent:
Place a dishwasher detergent tablet or powder in the detergent dispenser. You can also add a cup of white vinegar to the bottom of the dishwasher to boost the cleaning power.
5. Run a Heavy Cycle:
Select a heavy-duty or pots-and-pans cycle with the highest temperature setting on your dishwasher. This will ensure thorough cleaning.
6. Check and Reinstall:
After the cycle is complete, inspect the oven racks. If any stubborn stains remain, you can repeat the process or use a gentle abrasive pad to remove them. Once clean, dry the racks and reinstall them in your oven.
Using the dishwasher can be a convenient and effective way to clean oven racks, especially if your dishwasher can accommodate them. Just remember to check your oven racks' dimensions and the dishwasher's instructions for cleaning racks before proceeding.
Technique 4: Ammonia Fume Bath (Caution Required)
This method uses ammonia fumes to break down and loosen baked-on grease and grime. Please note that it requires caution and adequate ventilation.
Steps:
1. Gather Materials:
You'll need a large garbage bag, ammonia, and a well-ventilated outdoor area.
2. Prepare the Bag:
Place the oven racks inside a large garbage bag. Pour about half a cup of ammonia into the bag.
3. Seal the Bag:
Tightly seal the bag, ensuring that it's airtight.
4. Leave Overnight:
Place the sealed bag with the racks in an outdoor area with good ventilation. Allow it to sit overnight, preferably for at least 12 hours.
5. Ventilate and Rinse:
The next day, carefully open the bag in a well-ventilated space, as the fumes can be strong. Use gloves and avoid inhaling the fumes. Remove the oven racks and rinse them thoroughly with water.
6. Dry and Reinstall:
After rinsing, dry the racks completely with a towel and reinstall them in your oven.
While the ammonia fume bath can be effective, it should be used cautiously due to the strong odour and potential health risks associated with ammonia. Ensure proper ventilation and take necessary safety precautions.
Technique 5: Commercial Oven Rack Cleaners
If you prefer a hassle-free solution, consider using commercial oven rack cleaners. These products are designed to remove tough stains from oven racks and are readily available in stores.
Steps:
1. Read the Instructions:
Carefully read and follow the manufacturer's instructions on the commercial oven rack cleaner product you choose. These instructions may vary depending on the brand.
2. Wear Protective Gear:
Wear gloves and any other protective gear recommended on the product label when using commercial cleaners.
3. Apply and Wait:
Apply the cleaner as directed, ensuring that you cover all soiled areas. Most commercial cleaners require you to let the product sit for a specified time.
4. Scrub and Rinse:
Following the instructions, use a scrubbing pad or brush to remove the loosened dirt and stains. Rinse the racks thoroughly with water.
5. Dry and Reinstall:
After cleaning, dry the racks completely with a towel and reinstall them in your oven.
Commercial oven rack cleaners can be effective and convenient options for those who prefer ready-made solutions. However, always follow the manufacturer's instructions and safety guidelines.
Maintaining Clean Oven Racks
Cleaning your oven racks doesn't have to be a dreaded chore. With the right techniques and effort, you can restore them to a gleaming finish. To keep your oven racks in tip-top shape, here are some maintenance tips:
1. Line the Bottom of Your Oven:
Placing a sheet of aluminium foil or a reusable oven liner on the bottom of your oven can help catch spills and drips, preventing them from reaching the racks.
2. Clean Spills Promptly:
If a spill occurs in your oven, clean it up as soon as it's safe. This prevents the spill from baking onto the racks during subsequent use.
3. Use Oven Mitts and Pans:
Always use oven mitts or baking sheets to catch any potential drips or spills when cooking. This not only keeps your oven cleaner but also prolongs the life of your oven racks.
4. Regular Inspection:
Periodically check your oven racks for any signs of residue buildup, and address any issues promptly to prevent stubborn stains.
In conclusion, cleaning oven racks may require effort, but the results are well worth it. You can enjoy the benefits of improved cooking efficiency, enhanced food safety, and a longer-lasting appliance by choosing one of the effective techniques mentioned here or a combination. Keep your oven racks gleaming, and your culinary creations will shine. Happy cooking!
For more info about Cleaning Oven Racks, visit Fast Oven Cleaning.
© Fast Oven Cleaning

The Importance of Regular Oven Maintenance: Preventing Buildup and Extending Lifespan

Why is regular oven maintenance essential?
Hello there, fellow cooking enthusiasts! Today, we will discuss an essential but often overlooked aspect of kitchen care: regular oven maintenance. Whether you're a passionate home cook or a seasoned professional, your oven is likely the heart and soul of your culinary creations. So, let's delve into why regular oven maintenance prevents buildup and extends its lifespan.
Preventing Buildup: The Key to Efficiency
One of the primary reasons why regular oven maintenance is vital is to prevent the dreaded buildup. Over time, food particles, grease, and other debris can accumulate inside your oven, especially on the walls, racks, and heating elements. This buildup not only affects the aesthetic appeal of your oven but also hampers its performance.
You can ensure efficient heat distribution and airflow by diligently cleaning your oven and removing any residue. This, in turn, promotes even cooking and prevents hot spots or cold areas within the oven. A clean oven reduces the risk of unpleasant odours and smoke during cooking, making your culinary experience much more enjoyable.
Extend the Lifespan of Your Oven
Now that we've covered the importance of preventing buildup let's discuss how regular oven maintenance can significantly extend its lifespan. An oven is a significant investment for any kitchen, and you want to make the most of it. Caring for your oven can ensure it serves you well for many years.
Regular maintenance includes:
- Cleaning the oven interior.
- Wiping down the control panel.
- Checking the seals around the door.
Keeping your oven clean and free from excessive residue prevents corrosion and rust from developing. Moreover, maintaining the oven's components, such as the heating elements and fan, reduces the risk of costly repairs or breakdowns.
How often should you maintain your oven?
How frequently should you perform oven maintenance? Well, the answer depends on how often you use your oven. Monthly deep cleaning is advisable for avid bakers or professional chefs who use their ovens daily. This involves removing the racks and wiping the interior with a non-abrasive cleaner. Remember to clean the racks separately to remove any grime or food particles.
A quarterly deep cleaning should suffice for those who use their ovens less frequently. However, regular routine maintenance tasks are essential, such as wiping spills immediately and checking for any signs of wear or malfunction.
Top Tips for Oven Maintenance
To help you keep your oven in top shape, here are some friendly tips for effective maintenance:
Clean up spills promptly: As soon as any spills occur inside your oven, wipe them up to prevent them from baking onto the surface and becoming stubborn stains.
Use oven liners: Consider using oven liners to catch drips and spills. These removable liners can be easily cleaned or replaced, reducing the need for extensive oven cleaning.
Remember the self-cleaning function: Many modern ovens come with a self-cleaning function. Use this feature periodically to remove tough stains and buildup. Just remember to follow the manufacturer's instructions carefully.
Keep an eye on the seals: Regularly inspect the door seals for any signs of damage or wear. Damaged seals can compromise the oven's efficiency and lead to heat loss.
Schedule professional maintenance: Consider scheduling professional maintenance at least once a year. A trained technician can thoroughly inspect your oven, check for any underlying issues, and perform maintenance tasks that require professional expertise.
Oven Maintenance Made Easy: Simple Steps for a Sparkling Oven
Taking care of your oven can be a manageable task. You can keep your oven sparkling and functioning optimally with a few simple steps. Let's explore some easy and effective ways to maintain your oven.
Use Natural Cleaners for a Chemical-Free Approach
If you prefer a more natural approach to clean, you'll be pleased to know that you can maintain your oven using simple household ingredients. Baking soda and vinegar, for example, make a powerful duo for tackling stubborn stains and grease. Sprinkle baking soda on the oven's interior, spray vinegar over it, and let the mixture fizz. Then, wipe away the residue for a fresh and chemical-free clean.
Mind Your Oven's Exterior
While the interior of your oven requires regular attention, remember the exterior. Wipe down the control panel, knobs, and door handle with a damp cloth to remove grease or residue. Taking care of the external components keeps your oven looking great and prevents the accumulation of grime that could find its way inside.
Avoid Harsh Abrasives for a Gentle Touch
When cleaning your oven, it's essential to use non-abrasive materials to avoid damaging the surfaces. Abrasive cleaners or scrubbing pads can cause scratches and wear down the enamel or stainless steel. Opt for soft cloths or sponges and gentle cleaning agents to ensure your oven remains in top condition.
Don't Neglect the Oven Racks
Oven racks are often neglected during cleaning routines but also require attention to maintain their functionality. Remove the racks and soak them in warm soapy water to loosen any baked-on residue. Use a non-abrasive sponge or brush to scrub away the grime, rinse thoroughly, and let them dry before placing them back in the oven.
Pay Attention to the Oven's Ventilation
Proper ventilation is crucial for your oven's performance and longevity. Check the vents at the top or back of your oven for any obstructions or buildup. Use a soft brush or a vacuum cleaner to remove dust or debris hindering the airflow. Clearing the vents ensures that your oven operates efficiently and prevents overheating.
Handle Oven Spills Immediately
Accidents happen, and spills are inevitable in any kitchen. However, it's crucial to address oven spills promptly to prevent them from becoming stubborn stains. When a spill occurs, let the oven cool down, then wipe away the residue using a damp cloth or sponge. By tackling spills immediately, you save yourself the hassle of scrubbing hardened spills later.
Be Mindful of Oven Temperature Accuracy
Maintaining your oven's temperature accuracy is essential for achieving consistent cooking results. If your oven takes longer to reach the desired temperature or your food is consistently undercooked or overcooked, it may be time to calibrate your oven. Consult your oven's manual or contact a professional for guidance on calibrating the temperature settings.
Keep Your Oven Odor-Free
Unpleasant odours can linger in your oven, especially after cooking pungent dishes. Place a small bowl of baking soda inside to keep your oven smelling fresh when it's not in use. Baking soda is excellent for absorbing odours and will help eliminate any lingering smells. Remember to replace the baking soda regularly for continued freshness.
Teach Oven Safety to Kids
If you have little ones running around, educating them about oven safety is essential. Ensure they understand that the oven is not a toy and should never be touched without adult supervision. Instil in them the importance of staying away from the oven while it's in use and the dangers of reaching inside or tampering with the controls. By teaching your children about oven safety from an early age, you can create a safer environment in the kitchen.
Regularly Inspect and Replace Oven Light Bulbs
The oven light bulb allows you to monitor your food while cooking without opening the door. However, over time, the bulb may burn out or become dim. Make it a habit to inspect the oven light regularly and replace any bulbs no longer functioning properly. This ensures proper visibility and prevents the need to open the oven frequently, which can cause heat loss.
Follow the Manufacturer's Guidelines for Self-Cleaning Ovens
If your oven has a self-cleaning function, it can be a convenient way to remove stubborn buildup. However, following the manufacturer's guidelines when using this feature is essential. Self-cleaning cycles generate high temperatures to burn off the residue, so ensure your oven is in good condition and remove any easily combustible items from the vicinity. It's also advisable to open windows or provide proper ventilation during self-cleaning.
Schedule Professional Oven Maintenance
While regular maintenance tasks can be performed by yourself, it's also beneficial to schedule professional oven cleaning or maintenance from Fast Oven Cleaning at least once a year. A trained technician can thoroughly inspect your oven, check for potential issues, and perform in-depth cleaning and maintenance tasks requiring specialised tools and expertise. Professional maintenance helps identify and address any underlying problems early on, ensuring your oven's longevity.
Consider Using Oven Mats or Liners
You can invest in oven mats or liners to minimise the risk of spills and buildup. These non-stick mats can be placed at the bottom of your oven to catch drips, splatters, and crumbs. They are easily removable and can be cleaned or replaced, saving you time and effort in oven maintenance. Just make sure to choose safe liners at high temperatures and follow the manufacturer's instructions.
Stay Up to Date with Oven Technology
Oven technology constantly evolves, and new features and innovations are introduced regularly. Stay informed about the latest advancements in oven technology, such as self-cleaning functions, smart connectivity, and energy-efficient models. Upgrading to a more advanced oven can simplify maintenance tasks and improve performance.
Share Oven Maintenance Tips with Friends and Family
Lastly, don't keep your oven maintenance knowledge to yourself. Share these tips with friends and family who love spending time in the kitchen. Encourage them to prioritise oven maintenance to enhance their cooking experience and extend the lifespan of their ovens. Together, we can create a community of happy and well-maintained ovens!
Regular oven maintenance is crucial for preventing buildup and maintaining efficiency and extends the lifespan of your oven. By incorporating simple cleaning routines, being mindful of spills, and following the manufacturer's guidelines, you can keep your oven running smoothly and enjoy hassle-free cooking for years. Remember, a well-maintained oven is a chef's best friend!
© Fast Oven Cleaning

5 Ways to Clean Carpets Naturally

If you are looking for natural carpet cleaners, try the five methods we have explained below.
Steam Vapor
Water is one of the easiest and most efficient methods to clean and preserve your house. There is no need to worry about chemical reactions or unintentional intake because it is secure and straightforward to use. The Ladybug range of home steam cleaners from Advap is a fantastic choice if you're seeking to invest in new cleaning gear. You may use it to make cleaning easier and bring commercial-grade steam cleaning into your house.
Surfaces and carpets can be cleaned, sanitised, and deodorised using dry steam vapour by the Ladybug. Additionally, the high-temperature steam eliminates tiny pests like dust mites and helps fluff up the carpet's fibres. It works similarly to a vacuum in that you may use a towel attached to a big floor brush to pass over the carpet in two different directions.
Salt + Vinegar + Water
To make a stain-removing cleaning solution, you may combine water and vinegar in a 2:1 ratio in a large spray bottle. For instance, you might mix half a cup of vinegar with one cup of water. The mixture in the spray bottle should contain one teaspoon of salt for every cup of water. This is because the stain particles are more easily bound by salt. Spray the remedy on the stained area, allow it to remain for a few minutes, and then wipe it off with a cloth or brush. Rinse with water after cleansing.
To add a deodorising effect to your cleaning solution, add roughly ten drops of essential oil per cup of water. Choose a clear essential oil to avoid staining your carpet. Some popular essential oils for cleaning solutions include lavender, lime, peppermint, juniper, or geranium. Shake the solution to combine and spray it generously on the stained area or over the entire carpet. Allow it to dry before vacuuming the area. If you don't have a spray bottle, dip a cloth into the solution and gently dab it onto the stain. Remember to dab, not rub the solution on the stain.
Water + Vinegar + Baking soda
The classic baking soda and vinegar method is a tried and true way to tackle tough stains on your carpet. Start by generously sprinkling baking soda over the affected area, and for added deodorising power, you can even mix in a few drops of your favourite essential oil. Allow the baking soda to sit for at least an hour, or even better, overnight. Next, mix equal vinegar and water in a spray bottle and shake it well. Next, spray the mixture onto the baking soda and watch as it fizzes. Once the fizzing has subsided, use a clean cloth to blot up the mixture and repeat the process for particularly stubborn stains. This method will surely leave your carpet looking and smelling fresh and clean.
Vinegar + Borax + Salt
If your carpet has a stubborn stain, try making a solution of equal vinegar, salt, and borax. They can be combined to form a paste in a little bowl or another container. By doing this, you can avoid touching the irritating borax and stop the stain-causing substance's ability to transmit germs. Gloves are a great option for this process, especially if cleaning up something disgusting.
After applying the paste to the discoloured area:
Wait a few hours or until it has dried fully before moving on.
Make sure no household pets or kids consume the stuff.
Vacuum it up and out after it has dried. If the stain is still visible, you can scrape it with a moist cloth while occasionally washing it if necessary.
Vacuum the area once the water has dried, just in case.
Borax, Cornmeal + Cornstarch + Baking soda
To begin, combine two to three dried bay leaves in a food processor, one teaspoon of cinnamon, one tablespoon of borax, half a cup of cornmeal, half a cup of cornflour and two cups of baking soda.
Blend the items until combined and the bay leaves are reduced to a fine powder. Put the mixture in a mason jar or another airtight container.
Once you're pleased with how long the powder has been on the carpet, vacuum it up. Make sure the surface is dry before using. Next, use a broom or hand brush to massage the powder into the fibres of the carpet or rug you wish to clean. As long as possible, up to overnight, let it sit. Be careful if you have children or pets in your house since borax should not be consumed.
You can try out Fast Oven Cleaning if you are looking for a professional service to clean your carpets. They offer oven cleaning services as well.

Cleaning Your Oven Without Harsh Chemicals

When was the last time you focused on cleaning your oven? If you preheat it and start smelling the burnt remains of your previous cooking sessions, you need to get it done. Follow the steps ahead to make cleaning less of a chore while also avoiding any harsh chemicals you may be allergic to:
Get Rid of the Charred Bits
First, remove the racks and use a dry scrub brush to break up any large and obvious charred areas or loose crumbs stuck to the surface. Use the brush to gather the crumbs into a corner, then use a dustpan or vacuum cleaner to remove them.
Make Baking Soda Paste
Next up, you can create a paste made up of baking soda, water, and dish soap. Mix it up as well as you can until it’s a paste with the consistency of mashed potatoes. Depending on the size of your oven, you may need quite a bit.
Use a household sponge to cover the inside of your oven using the paste; also, pay attention to the floor, back and sides, and the oven door. Make sure you cover the entire area; the thicker a coating, the better. Focus on areas where the mess is caked on the most. Remember that you must avoid the oven vents and be careful around the oven light, as it may get hot to the touch as it stays on while you work. Once you’re done, shut the oven door and let the paste sit overnight before you move on to the next step.
Take a damp sponge and wipe away the wet paste in the morning. You will probably need to do a few passes with the clean sponge to get rid of all residue, but you will be able to get rid of a lot of gunk off the surfaces. For the more challenging spots, you should take a scrub brush and steel wool to break them down; just be extremely careful not to damage your oven’s finish, as that may create issues like rusting.
For a final pass, use a clean, wet sponge to remove any remaining residue and bring your oven back to a pristine, sparkling state. Let it air dry for a while with the door open, or you can close it and heat the oven for about 15 minutes to air out any smells.
Cleaning the Racks
You should ensure your oven racks are clean, so give them an overnight bath. Take an old towel or rag, some dish soap and dryer sheets and go to the bathtub or a large sink and cover them with soapy water. Put the old towel down to keep the tub enamel from getting scratched. Lay the racks down and cover them with hot water. Add half a cup of dish soap to the running water and sink the dryer sheets inside. Let them sit overnight before you take care of them in the morning. By then, the grime should be loose, so rub a scrub sponge or even use the wet dryer sheets over the racks; this should allow you to remove the buildup easily. Drain the tub and use the showerhead to rinse the racks to a shine, then place them in your now clean oven.
You will now have a clean oven you can enjoy; just remember to clean it at least once a month to prevent buildup in the future.

How To Clean Stains From The Glass Door Of The Oven
If you want to know how to clean stains from the oven door, you can follow this guide.
If you want to maintain your oven, ensure you know how to clean stains on the oven door properly. Every spill and splatter gets stuck to the oven door unless you clean it up. But if you get lazy, all that grime, grease and debris will build up over time. The good news is that you can spend a little effort cleaning your glass oven door. You can choose from several methods based on the model of your oven and your preferred cleaning methods. Now, let's talk about a few ways to clean stains off your oven glass door.
Supplies you need
Here are the tools and supplies you need to clean your oven glass door.
A vacuum cleaner with a crevice attachment
Cleaning cloths
Store-bought oven cleaner
Dish soap
Glass cleaner
Non-abrasive scour pad or sponge
Distilled white vinegar
Baking soda
Method 1. Remove the glass
- First, make sure that the oven is not hot.
- Open the oven door, attach your leg for support, and remove all the screws.
- After removing the glass, you can access the in-between layers that may be full of dust and crumbs.
- Use your vacuum hose to suck out all the dust and crumbs.
Removing the Built-Up Grease
You can use two items from your pantry to clean your glass door: vinegar and baking soda. The good news is that these two ingredients are a safe alternative to chemical-based cleaners.
- First, sprinkle a little baking soda and then spray with a mixture of one part water and one part vinegar.
- Use a non-abrasive sponge to spread across the glass, followed by a wipe to remove everything. Ensure the sponge is non-abrasive or may leave scratches on the glass.
- Use a glass cleaner to finish cleaning
- Reattach the glass door and tighten the screws.
Method #2. Don't remove the glass door
Although it's a good idea to take off the glass door before cleaning it, you may not be able to do it for some reason in some cases. So, if you want to clean the oven door without removing it, follow the steps given below:
- Wait for the oven to cool down before you start.
- Prepare a thick paste using water and baking soda. Use a rag or sponge to apply it all over the glass door. Wait for at least 15 minutes before you remove the paste. If stubborn dirt, grease or grime is on the door, wait overnight.
- Use a wet rag to remove the paste cost-effectively.
- If the door is still foggy, apply a drop of dish soap to wipe down the glass door. Afterwards, use a dry piece of clothing to rinse and clean thoroughly.
- As an alternative, you can prepare a mixture of equal parts of water and vinegar and fill up a bottle. Now, spray the mixture on your oven door and wipe with a cleaning cloth.
- You can go for a commercial glass door cleaner if you notice that baking soda has not done the job. The good news is that a good commercial cleaner can help deep clean the glass door. It's better to wait for a few minutes before you wipe down.
Clean the Exterior
If you want to remove stubborn grease splatters or stains from your oven door, apply a bit of grease-removal dish soap and then rinse with a wet cloth. The glass door will dry in a few minutes and start shining once again.
If you want to remove all those streaks, spray some glass cleaner on the lint-free cloth and use it to wipe the door in an s-shaped pattern.
Cleaning your oven door is not child's play. If you don't do it properly, you may end up damaging your oven door. Therefore, we suggest that you look for professional help. In this case, you can contact Fast Oven Cleaning, one of the best service providers.

4 Things You Should Always Remember About Oven Cleaning

Cleaning the oven is a time-consuming, messy job people would gladly postpone for as long as possible. Still, you must focus on all the beautiful benefits a spotless oven ensures – perfectly tasting dishes and a long-lasting machine. To prolong the lifespan of your pricey oven and make the most of your cooking sessions, here are four useful tips for proper oven cleaning:
Get to know the oven
Your oven is a complicated appliance with numerous parts and elements you need to get familiar with to clean the machine like a pro. You always need to remember that while some areas of the oven can be cleaned regularly, you should steer clear of components like the heating elements of the appliance. Typically you can see those on the roof of the oven. As ovens differ in construction and materials, you also need to know which parts are prone to scratches and corrosion and which ones you can safely address with cleaning products. Once your brand-new oven is brought home, read its manual thoroughly to get to know the machine and employ safe cleaning methods.
Go Green
when it comes to oven cleaning, you can rely on commercial cleaning products to tackle stains and odours in the interior. Yet most of these cleaners contain aggressive chemicals you should better avoid when cleaning the oven. Instead, pick reliable, eco-friendly ingredients to deal with the toughest oven mess without risking your health. Natural ingredients like baking soda and white vinegar are all you need to keep the oven clean in an eco-friendly way. Make a scrubbing paste of baking soda and water to safely eliminate food stains in the oven’s interior and remove food residue from the glass door. Banish germs and odours with a 50/50 eco-friendly mixture of water and white vinegar. Lemon juice also works wonders to refresh the oven by removing unwanted smells and losing tough stains. No matter how challenging oven cleaning seems, go for powerful eco-friendly cleaning approaches to keep the oven in top shape.
Don’t let spills sit
While baking your favourite veggies or preparing a tasty dessert for your family, food spills are likely to happen in the oven. To make oven cleaning a much less daunting task, do your best to tackle those leaks on time; otherwise, they will turn into tougher messes. Reacting to stains on time is a huge part of your smart oven cleaning routine, which guarantees simplified maintenance. Once you are done cooking your meal, check for spills and remove them right away. You can also act on food leaks while preparing the dish – open the oven’s door and sprinkle salt on the spill. Salt is a natural ingredient that is super effective when dealing with oily stains. As soon as the oven cools down, you can easily remove hardened residue using a plastic spatula.
Protect the oven
To facilitate oven clearing; you can take advantage of special oven sheets and liners to catch spills before they end up on the oven’s bottom. Do you love to cook meat or fish? Then purchase roasting bags that will prevent greasy messes in the oven and preserve your dish fresh and juicy. Invest in a baking tray you can put the dishes on, and splatters will land on the tray instead of contaminating the oven’s racks.
Don’t put off oven cleaning any longer
Just try these smart maintenance tips, and you will have your machine gleaming all the time.

Here is How you can Clean the Oven in About 5 Minutes
No one likes to clean the oven, which makes the chore one of the most overlooked cleaning tasks homeowners tend to postpone for months. Chances are, you are unwilling to spend hours cleaning the oven, but did you know you could deal with the job in just five minutes? Believe it or not, oven cleaning doesn’t have to steal lots of your free time. Just stick to this step-by-step guide to clean the oven in a flash:
- Prepare the oven – no matter how quickly you want to finish oven cleaning, never forget to make the appliance ready for the job. In fact, you need just a few seconds to check if the oven has been turned off from the electricity. After that, you need to make sure it is completely cool. That’s all – the oven is ready for cleaning.
- Mix a cleaning solution – speed cleaning the oven doesn’t have to involve dangerous chemical-based cleaners. Quite the opposite, you can speed clean the machine using only two eco-friendly ingredients you already have at home – baking soda and water. Take a handy glass bowl and mix half a cup of baking soda with a little water to prepare a natural DIY oven cleaning solution. Keep in mind that you need to make enough scrubbing paste to perfectly cover the oven's interior. So in case you are dealing with an extremely grimy oven, you might want to double the amounts of both ingredients to make enough baking soda paste. With your oven cleaning remedy prepared, open the oven door and apply the paste. Steer clear of the heating elements to prevent oven damage. Once the interior has been covered with the solution, let the mixture sit overnight.
- Clean the racks – while waiting for your eco-friendly cleaning paste to work its magic in the oven, you should address the oven’s racks. Just like the interior of the machine, the racks can get grimy, that’s why you should make them part of your oven cleaning routine. Banishing stains from the racks is an easy job that takes no time. Simply fill the sink or the bathtub with hot water mixed with some white distilled vinegar and allow the racks to soak, so that buildup grime can loosen up. If you are faced with stubborn grease, scrub the racks with a stiff brush and rinse them thoroughly. Then let them dry on a clean soft towel.
- Remove the cleaning paste – as the required time has passed, you should come back to the oven and wipe baking soda residue with a damp cloth. As one of the most powerful eco-friendly cleaning ingredients, baking soda should have loosened up burnt-on grease, allowing you to clean the oven by just wiping the interior. However, if you encounter stubborn messes you can’t wipe with a cloth, use a plastic spatula to easily scrub them off.
- Upgrade with white vinegar – another eco-friendly cleaning agent to include in your oven cleaning approach is white distilled vinegar. When it comes to eliminating germs and bacteria from the oven, it is white vinegar that you should choose. Pour it into a spraying bottle and spritz the oven's interior while the baking soda is still there. If you notice foam in the oven, don’t worry – this is a normal reaction of baking soda and white vinegar mixing. Take a damp cloth and wipe the oven clean, paying attention to nooks and crannies. You might also spray the surface one more time with white vinegar to make sure the interior is squeaky clean. Wipe with a cloth again and you are done cleaning the oven.
It takes only a few simple steps to effortlessly clean the oven. Plus, the approach is eco-friendly and safe for your health.

5 Hidden Dangers of a Messy oven and Why You Should Always do Proper Oven Cleaning
Oven cleaning is a daunting task, which is why most homeowners tend to overlook the chore for as long as possible. Unfortunately, your expensive appliance requires regular maintenance and ignoring the oven cleaning routine might have a negative impact not only on the machine but on the quality of your meals too. To motivate yourself to clean the oven often enough, check on these five hidden threats a dirty oven is likely to pose:
- Poorly cooked food – while baking a dish, spills normally occur in the oven. However, not removing those messes on time leads to their burning the next time you are preparing food. From baking meat to cook a delicious cake, the carbon-based fumes released by burning food residue will have a negative effect on the way your meals taste. Furthermore, a dirty oven might be unable to perform as expected, thus causing undercooked food. So if you notice that your dishes don’t taste as perfectly as they used to, check on your oven’s interior – perhaps you haven’t cleaned it for a while. Remove burnt-on food residue to improve the flavour of your meals.
- Dangerous smoke – experts in oven cleaning recommend that you should wipe the oven clean after each cooking to get rid of food spills right away. That’s because untended messes might create dangerous smoke the next time you try to make a dish. Burning food leftovers in the oven is likely to release toxic gases like carbon monoxide and dioxide that could be dangerous not only to your health but to the environment as well. Luckily you can prevent dangerous smokes in the oven by simply wiping the machine each time you are done cooking. To maintain the oven clean, pick eco-friendly cleaning methods that pose no threat to your health or nature.
- Risk of fire – it sounds like common sense that a smoky oven might cause a kitchen fire. According to the pros, a huge number of such accidents have been caused by malfunctioning ovens and a typical cause for oven malfunction is grime in the appliance. If you notice oven smoke while baking a dish, this is a clear sign your oven needs a deep cleaning. To minimise the chance of a kitchen fire, keep the oven spotless. Book a professional oven cleaning service from time to time to rest assured your machine is absolutely safe to use.
- Costly repairs – if your oven is messy, the normal airflow in the appliance might be affected and the oven might be unable to reach the necessary degree required to cook the meal. Grease and filth in the oven block the airflow, which could cause oven malfunction. As already explained, a poorly functioning oven might be a reason for a kitchen fire, but you should also realise fixing an underperforming oven is not a cheap service. On the other hand, a squeaky clean machine is much less likely to break, since no dirt will affect the airflow inside. Keep the oven in top condition to avoid pricey repairs in the future.
- Nasty pests – given the fact that most of the unaddressed filth in your oven has been caused by food spills, unwanted guests might be attracted by the messes. Rodents, as well as cockroaches, could invade your kitchen if you leave the oven dirty for too long. You need to remember that pests are not only gross to share a roof with, but they can trigger various health problems as well. To banish nasty pests from your kitchen, tackle food residue in the oven regularly.
While dealing with your kitchen cleaning jobs, don’t forget to take care of the oven. This way you will certainly avoid all the hidden threats a filthy appliance might pose.

4 Natural Ways to Clean Your Oven with Ease

Finding the best oven cleaning product is not an easy task. With the great variety of cleansers available on the market, you might get confused about the most effective product to rely on. However, store-bought oven cleaners are not the healthy way to go. Instead of wasting your time searching for an appropriate detergent, go for natural oven cleaning methods. Are you interested in disinfecting your most valuable kitchen appliance in an eco-friendly way? Here’s how to do it:
- Use lemons – lemons are famous for their antibacterial qualities, which makes them a great solution to refresh the oven’s interior. Take a large, ovenproof bowl and fill it with water. Then grab two lemons, slice them in half and put both the halves in the bowl. Preheat the oven to 250 degrees and place the bowl inside the machine, preferably on the racks. Let the natural mixture stay in the oven for at least one hour, then turn off the machine and leave the door open for a while to let it cool a bit. With your oven still warm, take a clean towel or a cloth and wipe clean the interior to remove loose food residue and stains.
- Use salt – to clean the oven naturally, you can prepare an effective scrubbing paste by mixing equal amounts of salt, baking soda and water. Make enough paste to generously cover the walls and the bottom of your oven. Let the eco-friendly solution sit for a few hours, then wipe clean with a damp cloth or a loofah. If your oven is extremely dirty, you might have to scrub on the burnt-on grease to remove it with ease. In case this approach doesn’t seem to get the job done, just turn on the oven for an hour, let it cool off and wipe again with another damp cloth.
- Use baking soda – this is one of the most famous eco-friendly manners to sanitise the oven and you should no doubt give it a try. Mix sufficient proportions of baking soda and water to prepare a scrubbing paste and cover the walls and the bottom of your oven. Let your natural cleaning remedy sit for at least 12 hours in the machine, so that it can work its magic and cut through stubborn grease. As the necessary time has passed, wipe your oven’s interior with a damp cloth. To effortlessly break through burnt-on grease, spray the surface with a mixture of equal amounts of white vinegar and water. In case you are dealing with a pretty dirty oven that hasn’t been disinfected for months, you might have to repeat the procedure one more time to obtain a spotless, germ-free oven.
- Use white vinegar – make the most of the cleaning potential of white distilled vinegar and clean the oven naturally with the help of this magical ingredient. Start by removing large food particles from the interior using a handheld vacuum cleaner. After that, you should place a large baking pan filled with water at the bottom of your oven and add half a cup of white vinegar. Turn the oven on 350 degrees and wait for steam to appear inside the machine. While the oven is still hot, open the door and spray some water-white vinegar mixture on the walls. Then close the door and wait for about 30 minutes. This time is necessary for the ingredients to cut through dirt and stains. Once the oven cools completely, wipe it clean with a damp cloth to get rid of residue, stains and bacteria your machine has been harbouring.
As you see, no chemicals are required for you to enjoy a sparkly clean oven. With the help of these effective natural ingredients, you can disinfect the oven safely, without getting yourself exposed to dangerous chemicals store-bought cleaners contain.

5 Oven Cleaning Methods that Don’t Involve Harsh Chemicals
Using chemical-based cleaning products is among the great number of factors that hurt our health. While some of those factors can’t be avoided, you can easily give up on harsh cleansers and opt for safe, eco-friendly alternatives. In order to improve your lifestyle and adopt a healthier cleaning routine, you should learn how to maintain the oven without employing dangerous chemicals. Here is a list of eco-friendly cleaning hacks that will keep the oven squeaky clean all the time:
- Mix baking soda and white vinegar – it is so easy to restore the perfect shape of your oven with the help of these two natural ingredients – baking soda and white distilled vinegar. Take a bowl and mix enough amounts of both ingredients, so that you can prepare a paste-like mixture. Empty your oven’s interior and spread the paste generously in the appliance, but avoid the heating components at all costs. Wait for the solution to sit for at least a few hours, then wipe clean with a damp loofah. This eco-friendly mixture will take care of not only dirt and spills but nasty germs too.
- Steam clean naturally – to loosen up tough oven stains, you can reach for just some white vinegar. Fill a bowl with water and boil the water, then add a little white vinegar. Boil the mixture for about 30 seconds, take it off the stove and place it inside your oven. There is no need for you to turn the machine on because the steamy mixture will work its magic in just an hour. Once you have waited long enough, remove the bowl from the oven and wipe the interior clean. This eco-friendly cleaning hack allows you to get rid of stubborn messes without wasting hours scrubbing them.
- Add lemon juice - another natural solution you can rely on to loosen up challenging oven messes is lemon juice. Take a pan and preheat some water, then squeeze two lemons into the mixture. If you prefer, you can slice the lemons and put the halves directly in the pan. After that remove the pan from the stove and place it on your oven’s racks. Turn the appliance on and wait until steam appears. Similar to the white vinegar steam cleaning hack, the steamy lemon solution will loosen up grease, thus letting you clean the oven effortlessly.
- Use vinegar for the racks – the racks of your oven get just as grimy as any other area of your machine’s interior, which is why an eco-friendly cleaning method should be employed. Whenever you decide it’s time to clean the oven, address the racks as well by making the most of white vinegar. Fill the bathtub with hot water and add some of the ingredients to eliminate tough stains. Soaking the racks in a vinegar-based solution means germs, bacteria and burnt-on grease will become easy to remove in just a few hours. As the required time has passed, take out the racks and rinse them thoroughly with tepid water before you return them to the oven.
- Prevent messes with salt – the more time a mess spends in your oven, the more difficult it becomes to be eliminated. Here is an effective way for you to prevent a small spill from turning into a huge nightmare – use a little salt. While baking a dish, you might notice a tiny leak and this is the moment to put salt in action. Open your oven’s door and sprinkle salt on the mess. Once the machine is cool enough, you can come back and finish the cleaning procedure, as the stained area will be much easier to wipe clean.
Any oven cleaning task can be addressed with eco-friendly cleaning solutions. Give up on those harsh chemical-based cleaning products and utilise natural ingredients to rest assured your oven has been cleaned safely.

6 Oven Cleaning Mistakes that can Ruin the Appliance

On the market, you can discover so many modern types of ovens, all of them guaranteeing flawlessly prepared meals. However, the longevity of your functional appliance could be compromised if you don’t know how to clean it with the most appropriate techniques. Oven cleaning mistakes are among the common reasons why a pricey oven might break down too soon, so you should steer clear of these six dangerous mistakes non-experts often make:
- Don’t place aluminium foil – perhaps you have heard of a widely known approach for keeping the bottom of the oven clean while baking a meal – using aluminium foil. While some people believe that catching spills with aluminium foil is a smart trick to postpone oven cleaning you should never do that. When placing the foil at the bottom of your machine you are likely to end up with overcooked or undercooked dishes because of the uneven distribution of heat the foil might cause. Furthermore, this method can lead to blocking the airflow inside the oven and damage the heating element. So instead of trying to preserve the oven spotless while cooking, just invest more time in regular cleaning.
- Don’t spray the cleaner directly on the knobs – spraying your favourite oven cleaning product directly on the knobs can lead to pricey damages to your oven’s control panel. That’s because the liquid substance might find its way behind the knobs and cause serious electrical problems. Instead of sticking to this habit, take a clean cloth or a rag and use it to transfer the cleanser from it to the knobs.
- Don’t count on the self-cleaning function all the time – there is no doubt that ovens with self-cleaning features provide simplified maintenance, but the truth is nothing can beat manual cleaning. Relying solely on the self-cleaning function is a mistake you should correct as soon as possible, or else you risk the oven malfunction. While cleaning itself, your oven reaches extremely high temperatures meant to loosen up stubborn grime. Obviously, the dirtier your oven is, the more dangerous self-cleaning becomes. Instead of expecting the oven to do the heavy lifting for you, you should stay devoted to cleaning and address your oven’s cleaning needs on time. Not until you are certain the oven is clean enough should you take advantage of the self-cleaning feature.
- Don’t overlook regular cleaning – as you have already discovered, keeping the oven clean is the best you can do for a fully functional machine. On the contrary, a neglected appliance is likely to malfunction, since burnt-on food residue might block the heating elements, thus overloading the oven. Instead of waiting for the last moment to disinfect the oven, follow a strict cleaning routine and disinfect the machine at least twice a month.
- Don’t be aggressive with the glass door – although the material used for manufacturing an oven’s glass door is extremely durable, special attention must be paid when addressing the surface. Aggressive cleaning products can scratch the glass while slamming the door carelessly can cause microscopic cracks. Assuming the fact that you want to preserve the glass door in top condition, be gentle in the way you treat it.
- Don’t forget the racks – if you are used to cleaning your oven’s interior, but you tend to skip the tacks, this is another risky approach you should reconsider. Poorly maintained racks can easily catch fire, which will lead to costly repairs. Instead of overlooking the racks, make them part of your oven cleaning routine. Disinfecting the racks is not a challenging job – take them out and soak them in hot water mixed with white vinegar. This powerful eco-friendly ingredient will break through tough food residue, allowing you to clean the racks effortlessly.
A properly cleaned oven will last longer, which is why dangerous cleaning mistakes need to be avoided at all costs. As long as you stick to the right cleaning techniques, you will be able to enjoy a durable appliance.

A Step-by-Step Guide to Deep Clean Your Oven
From scrubbing burnt-on grease to ensuring a fresh scent, deep cleaning the oven is one of the most daunting chores you have to tackle. A dirty oven may ruin the taste of your meals or even cause a fire in the kitchen, that’s why you need to make sure your machine operates safely. Are you familiar with the most effective oven cleaning methods? Just follow the steps below and your appliance will get stain-free in no time:
- Empty the oven - you should start with an empty oven, which means that all detachable parts should be removed from the interior before you do anything else. Remove the thermometers, as well as your oven's racks. To save valuable time, you can clean the racks now, since the process may take a while. Soak the racks in your bathtub or the sink in a solution of hot water and half-cup dishwashing soap. The dish soap would cut through the grease, making the racks easy to wipe clean. After you empty the oven and soak the racks, you can move on with the next step.
- Decide on the cleanser - while it is perfectly good to apply a store-bought oven cleaning solution, you can also take advantage of a homemade cleaning paste you should prepare with half a cup of baking soda mixed with a few cups of water. This solution is the eco-friendly way to go, but if you prefer using a commercial cleanser, do your best to find one containing as few chemicals as possible.
- Apply the solution - once you have decided on your cleaning product, it's time for you to address the interior of your oven. Cover the appliance with the cleanser, but be extra careful and steer clear of the heating elements of your oven. If you have chosen to go with a commercial oven cleaning product, you need to read its label, so that you can discover the right method for applying the cleanser. It is important to follow manufacturer's guides for application, otherwise, you wouldn't be able to remove build-up grime completely. In case that eco-friendly cleaning paste of baking soda is what you have decided on, spread a generous amount in your oven's interior and let the mixture sit there for at least twelve hours or overnight, if possible. Baking soda requires time to break through grease, thus allowing you to scrub grime effortlessly.
- Go back to the racks - several hours have passed since you soaked the racks, so now dirt is supposed to be simple to remove. Take the racks out of the bathtub or the sink and start wiping them clean with a cloth. If grime seems stubborn to remove with a cloth, take a bristle brush to eliminate residue. Once your oven's racks look as shiny as new, rinse them thoroughly and let them dry before you return them to the oven.
- Disinfect the oven - the racks are ready now and you can continue sanitising your oven's interior. Assuming the fact that you have waited long enough for your cleaning product to do its magic, you should now wipe the dirt away. Get a damp cloth and collect what's left of the solution, together with loosening dirt. With a powerful cleanser and a relatively clean oven, a single wipe or two would be enough, but if your oven hasn't been disinfected for a while, use a spatula to tackle tough messes. Since the oven's exterior needs to be just as clean as the interior, don't forget to wipe the surface of the appliance with a damp cloth and an appropriate solution.
For the sake of your health, you shouldn't let dirt and grease spend months in your oven. Every now and then take advantage of this step-by-step guide, so that you can rest assured your oven is safe to work with.

HOW TO CLEAN YOUR OVEN THE ECO-FRIENDLY WAY
The need for people to move, from a less environmental-friendly routine to a more environmental-friendly one, which considers the health and safety of the people and environment, has become a subject of discussion all over the media space. The concern is that most of the traditional cleaning methods and solutions have been discovered to pose severe threats to humans and the environment. Eco-friendly cleaning methods and solutions are organic and have no health implications. I remember on one occasion, where I used a particular chemical cleaner that was recommended by a friend after I told her about my messy kitchen. The day after I cleaned my oven with the suggested solution, when I turned on my oven to heat my casseroles, the after-taste of my food was that of the chemical cleaner. Since that day, I am using only green cleaning approach for my oven or no cleaning at all.
Many conventional cleaning solutions are not particularly environmentally-friendly, and some contain very toxic chemicals. A popular example of a conventional oven cleaning chemical is the Diethylene glycol monobutyl ether. This chemical poses danger for aquatic animals. I am sure you wouldn’t want to be responsible for the death of over ten thousand fishes.
Let us consider some eco-friendly methods of cleaning your oven at home;
Baking soda: Combine baking soda and water until you get a paste-like solution. Don’t worry, baking soda can be found in almost every grocery store. Use the paste to coat the oven’s surfaces and let it sit for some time. Using damp, clean cloth or brush wipe the surfaces.
- Vinegar: To get rid of burn spills and spots in your oven, you will only need vinegar. Spray the spot with vinegar, and let it sit for a few hours. Wipe the surface with a damp cloth. Your oven will be as clean as new. That is awesome.
- Vinegar, mixed with baking soda is the perfect combo: This is a magical combination. Spray the inside of the oven with vinegar, and then sprinkle with baking soda. Leave for some time to allow the two ingredients to do their magic, and then wipe with a damp cotton cloth.
- Salt: Leave your oven to cool down after using it for some time. Mix a small amount of water with cooking salt and spread throughout the oven, and leave for some time. Wipe with a clean damp cloth.
- Baking soda and Ammonia: To carry out this procedure, you need to warm your oven at about 200C, and then turn it off. Put ammonia in an oven-safe dish and place on the middle rack. In a second oven-safe dish, pour boiling water and place on the bottom rack. Close your oven and let it sit for at least 30 minutes. Then remove the two dishes, Sprinkle baking soda in the oven and then wipe with a clean damp cloth.
- Baking soda, vinegar and dish soap: mix baking soda, white vinegar and a small amount of dish soap. Apply the solution inside the oven. Leave for some time, and then wipe with warm water and clean cloth.
- CONCLUSION
Cleaning your oven using eco-friendly methods is very easy, contrary to what you must have heard from friends. The methods outlined above are safe and don't pose any serious health threats. Consider using them to clean your oven.

Cleaning your Oven with Baking soda- Does it work?
Cleaning is an essential part of our everyday lives. Without it, we cannot leave a healthy, germ-free and allergen-free living. But what if your oven or kitchen need cleaning after a cooking session? The first thing that comes to mind is using expensive top-shelf products to get rid of the grime and grease. But what if you don't need to spend so much money on cleaning products and still get the excellent cleaning results you are after? The secret is baking soda. With the potent power of baking soda, you can quickly get rid of harsh stains, that sometimes even expensive commercial cleaning solutions cannot deal with.
Baking soda is not only suitable for oven cleaning, but you can also clean almost everything with it. In this article, there are smart tricks of how to use baking soda to clean oven, counter and stove.
Oven cleaning:
For this, all you need to do is take one and a half cup of baking soda and two and a half or three tablespoons of water. Mix the baking soda with the water until it turns into a paste. Take the racks out of the oven and apply the paste all over the walls of the oven. Avoid the heating elements. You can even apply the paste on the glass of the oven door. Let it sit for 15 to 20 minutes and wipe with a wet towel or cloth. If there are tough stains left, apply the paste again and scrub with a soft brush.
You can leave the mixture overnight to avoid scrubbing. Just wipe the hardened paste in the morning, and you will be amazed by the results.
Stove:
Wait for your stove to cool down. Apply the same paste on your stove, let it sit for 30 minutes and wipe with a clean cloth.
Counter
Before using this method, you must make sure that your counter is not made of natural elements like stone or it is not made of some porous materials. Baking soda can damage these materials. If your counter is made from one of these materials, you must stick to specialised cleaning solutions.
However, if you can use baking soda, add 3 tablespoons of white vinegar to the previous mixture, apply, let it sit for 10 minutes and wipe with a wet cloth. The mix of baking soda and vinegar gets rid of all the germs and bacteria.
Final words:
Baking soda is one of these kitchen ingredients we very often neglect or even forget that we have. Mix it with water, apply on your stove or in your oven and soon you will be amazed by the end results.
